We arrived at the cafe a couple of minutes early, where we signed in and collected a packet of recipes. Right on time Stephanie invited the approximately dozen people into the back kitchen area, which was where the class took place. Everyone put their personal things away and washed their hands, then took places around the work table in the center of the room. There was a large, beautifully arranged cheese board in the center of the table for us to sample. As most of the recipes were finished, we got to taste them too.
To start, Stephanie had everyone introduce themselves and tell why they were taking the class. Some people were there for themselves, and others because they wanted to cook healthier for their family members. The common denominator, though, was that everyone was following a predominantly plant-based diet.
Over the course of two hours Stephanie showed us how to make three cashew-based cheeses (and one based on almonds). All of them started with soaked nuts, which were pureed in a blender with spices and other ingredients. Some of the recipes included nutritional yeast, and others used thickening agents. Some were cooked, and some were not.
The first recipe Stephanie made was a queso cheese, which was a simple blend of cashews, nutritional yeast, spices, and a canned chipotle in adobo sauce, served with tortilla chips. This one was pretty good (and I even went back for seconds), but I personally would have added more heat to it. I did not take a photo of this one.
For the second cheese Stephanie made a "Melty, Stretchy, Gooey" mozzarella that she said was great for grilled cheese, quesadillas, or vegetarian lasagna. A combination of soaked cashews, yogurt, acid, nut milk, nutritional yeast, and tapioca starch were blended together and cooked. Stephanie said it was important to stir the entire time the cheese was on the heat. This was served with toasted sourdough bread.
 |
| Cooking the mozzarella |
 |
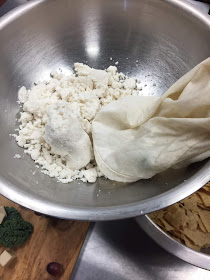
| Blended almond solids-the beginning of chèvre |
The last cheese was a pepper jack, which Stephanie told us could be cubed, grated, or sliced. It was the most complicated recipe, and used several new-to-me ingredients. After the cashews were blended with plant-based milk cider vinegar, coconut oil, spices, tapioca starch, inulin, and carrageenan it was heated to a specific temperature. Stephanie mixed in diced jalapeno, red pepper, and pepper flakes, then scooped the mixture into molds. There wasn't time for the cheese to completely set up, so we were not able to sample this variety. It sure looked good, though.
 |
| Spreading pepperjack into molds |
Five years ago today: But I Saw It On The Internet!
Blessed are the cheese makers for they will have cheese on toast.
ReplyDeleteGod bless.
Cheese on toast....Mmmmmm!!!!!!
DeleteCool stuff! We have a product sold in the stores, made with this. It gave me some issues with shelf life, though.
ReplyDeleteI think any preservative-free product doesn't last as long as a conventional one. If you opened up the door of my freezer you would find a multitude of small containers, each holding a single- or double-serving of something.
DeleteThanks for sharing this interesting experience, it gives us a good idea of the process.
ReplyDeleteYou're welcome.
DeleteThis is fascinating. Long way from making yogurt.
ReplyDeleteYes, it is.
DeleteHi Kathy - I took one course on Vancouver Island (before I came back to the UK) ... but went with a milk producer - so logical it was milk based cheese. I'd love to try these and see how they were made - great read and thanks for the info ... cheers Hilary
ReplyDeleteI understand you can buy some plant-based cheeses at Whole Foods or natural grocery stores. However, in my opinion store bought is never as good as fresh made.
DeleteWhat an interesting and helpful post. It is so full of great information. Thank you for sharing it. I learned a lot here that I didn't know before reading it here. Keep up the good work!
ReplyDeleteWishing you a wonderful week!
Thanks! Glad I could be of service.
DeleteIt’s funny how now that we’ve moved to Hawaii, I rarely cook with cheese anymore.
ReplyDeleteThat probably speaks to the healthiness of your diet now.
DeleteThis class sounds like it was so interesting. I would have been disappointed not to have tasted the Pepper Jack, as it's one of my favorites. Too bad she didn't have some pre-made for you to try.
ReplyDeleteI agree, but when she said her father-in-law had passed away in the last week I was amazed that the class was even held as scheduled.
DeleteWhat a fun class and I like that your hubby went with you.
ReplyDeleteI don't think I could give up my Tillamook cheese.
We usually don't have 'dates' on Sunday morning, but this was a good one!
Delete